Are you looking for an effective grammar checker that integrates with your browser? Grammarly offers a free extension on Chrome Store to give you real-time spelling and grammar suggestions.
I’ll show you how to use Grammarly with the Chrome extension on Google Docs or Gmail in this guide. These steps to installing the plugin are easy to follow!
How the Grammarly Chrome Extension Works
Grammarly is a grammar checker and plagiarism tool that offers extensions for different browsers, including Firefox, Safari, Microsoft Edge, and Chrome. It works by underlining any spelling or grammatical mistakes you make on a text field. If you hover on the text, it will show the correct suggestion.
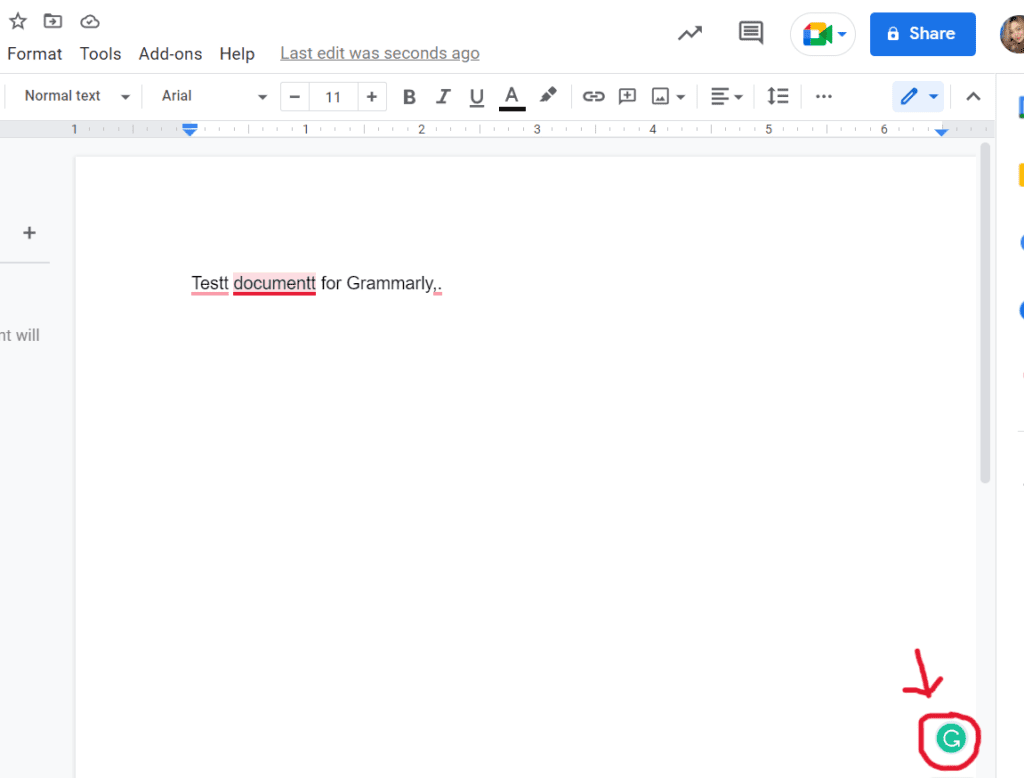
To accept the suggestion, hover over the text and click on the suggestion. The Grammarly icon on the lower right should spin as you’re typing to let you know it’s working. Note that it only works in text areas equal to or bigger than a height of 38 pixels.
If you use Grammarly Premium, the extension doesn’t always underline basic mistakes with clarity, engagement, and delivery-focused errors. It would help if you opened a floating sidebar that would display all your mistakes.
Using Grammarly for Chrome in Google Docs
Here are some steps to use the popular tool Grammarly for Chrome on Google Docs. These instructions also apply to other websites like Gmail, WordPress, LinkedIn, and Twitter.
1. Download Grammarly for Chrome

Start by downloading the Grammarly plugin for Chrome. Open Google Chrome and go to Chrome Store. You can do this by clicking to see all apps or searching “Chrome Store” on the search box.
Look for the Grammarly browser extension and click “Add to Chrome.” The extension should start downloading within seconds.
2. Sign up for Grammarly

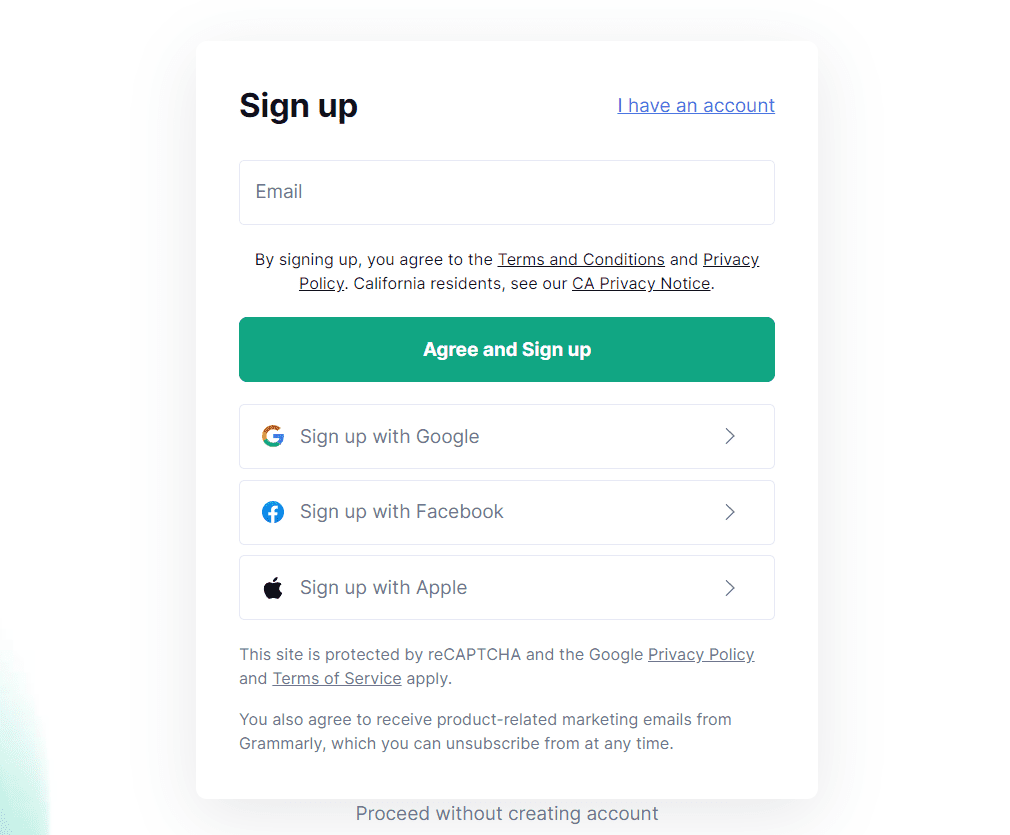
Once the download has been completed, Grammarly will take you to the welcome page. The plugin instantly becomes active when you enable it on Chrome. However, the best features only appear when you enter your login details.
You can sign up for a free account. Doing so will allow you to enable or disable the plugin on any website, add words to your personal dictionary, and save your work.
Signing up for Grammarly will also give you weekly writing statistics via email. If you’ve got an account, log in to enjoy the best features. You can see my full analysis of the tool here.
3. Click the Grammarly Logo

Head to Google Docs and open a new or existing document. Then, on the bottom right of the page, you will see a green Grammarly logo with the letter G. Click it to set goals.
4. Set goals

A huge pop-up window will appear once you click on the logo. It will lead to the main editor, which provides detailed explanations for its corrections. Or it may lead Grammarly to open its sidebar.
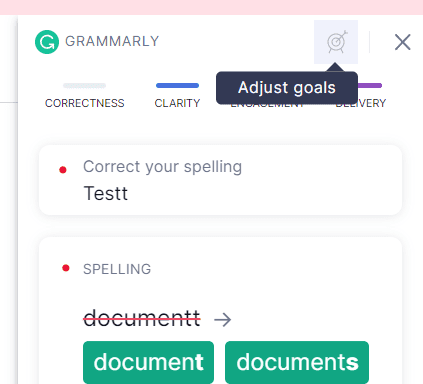
But before accepting or declining each recommendation, you should click on “Goals” first. You can access this on the sidebar by clicking on the arrow and target icon.
Then, a new pop-up window will open where you can set objectives to receive genre-specific corrections. It will help Grammarly’s AI understand the type and purpose of your text to serve you better.
The goals are divided into “Intent,” “Audience,” “Style,” “Emotion,” and “Domain.” For example, under “Intent,” you can choose whether your text should inform, describe, convince, or tell a story. Under style, you can state whether the text is formal or informal.
5. Check Grammar and Plagiarism

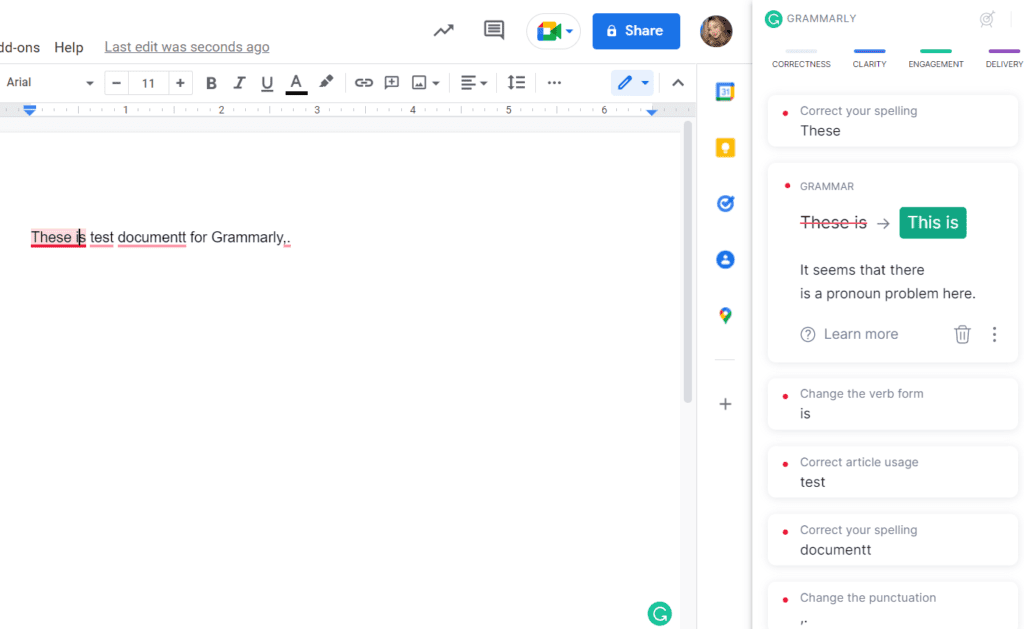
Grammarly for Docs works the same way on the rest of the web. Grammarly will underline words and phrases which are grammatically incorrect or misspelled. Hover on the word to correct. You can also double-click words to check for synonyms.
You can also open the sidebar to access the corrections in a more organized manner. This feature also shows explanations behind your mistakes. For example, if you have a missing verb in your sentence, Grammarly tells you to add one.
If you’re a Premium user, you can check your document for plagiarism. It will help if you access the web editor when using this functionality. Click on the Plagiarism button, and Grammarly will scan your document against billions of web pages and published papers.
The editor will flag any duplicate content on your work, whether the plagiarism is accidental or intentional. Then, it provides links to the source so you can properly cite it. Keep correcting your document until the overall originality score is at least 98.
Checking Grammar (Premium Features)
Grammarly Premium lets you correct more than just your spelling and grammar. It will also underline your errors in clarity, engagement, and delivery. For instance, it will suggest sentence rewrites from the passive to active voice.
The Premium version of Grammarly also ensures the consistency of your tone. Whether you customize your corrections for formality or friendliness, Grammarly will help. It can even spot offensive or dated language.
Other Grammarly Premium features include plagiarism detection, fluency, word choice, and conciseness. The application will underline your mistakes in blue, red, green, and violet.
What makes Grammarly better than other grammar checkers is its detailed explanations. The extension will let you know why you need to make a sentence rewrite.
Managing Settings
You can change the settings on Grammarly Chrome by clicking the Grammarly logo on the bottom right of the text field. Once the sidebar opens, select the gear icon so you can change the settings.
You can also click the Grammarly icon on the toolbar of Chrome. It will automatically open the settings. Feel free to enable or disable writing suggestions, definitions and synonyms, show phrasal predictions, etc.
For example, your style guide might not use the Oxford comma. You have the option to disable this in your account settings.
The Grammarly settings on the extension also let you select your English variation reference and open a new document.
Why is My Grammarly Extension Not Working?
Grammarly’s Chrome extension is an excellent invention, but it’s not perfect. For example, it will be challenging to correct the mistakes manually. Even if the extension underlines your misspellings and you click on them, it sometimes doesn’t change the text.
That’s because Grammarly is still in beta mode. It’s the second phase of testing where the program can be used by consumers to try out. Grammarly is still undergoing continuous improvement to give you the best experience.
In the meantime, you can resolve other issues with Grammarly through the following.
Restart Chrome
Restarting Chrome can help you remove any conflicting API and cache that could be causing the malfunction. You can restart Chrome by typing ‘Chrome://restart’ in the URL bar and pressing enter. Chrome will reopen on its own.
Reinstall Grammarly Extension
If you tried restarting Chrome and it still doesn’t work, then there might be a problem with Grammarly itself. Click on the menu icon with the three circles on the top right hub. Look for “Extensions” and click on Grammarly. Remove Grammarly and reinstall it in Chrome Store.
Clear Your Browser Cache
Chrome’s cache can consume excessive memory on your hard drive. It can also hinder your extensions from working, explaining why Grammarly isn’t operating.
Open Chrome and click on the icon with the three dots on top. Click “Settings,” then choose “Privacy and Security.” Select “Clear Browsing Data.”
Chrome will automatically clear your cookies, so Grammarly should start working again.
How Do I Add Grammarly to Gmail?
Adding Grammarly to your Gmail is the same as adding it to Google Docs. Install the Chrome Extension as stated above, and open Gmail. Then, click on the Grammarly extension icon and enable it.
Try composing an email to check if Grammarly underlines your spelling and grammar errors. Hover on any mistake and click on the suggested word to correct it.
Try Grammarly for Chrome Now
Now you know how to add Grammarly to Chrome. Find the free extension on the Google Chrome Store and click “Install.” Use it to receive real-time corrections on Google Docs, Gmail, and other websites on your browser.
For the best results, I recommend you subscribe to Grammarly Premium. It will give you access to more grammar suggestions and a plagiarism checker. Try it now!
