The standard editing stereotype uses a red pen and proofreading marks on printed documents. But with Microsoft Word, the entire editing process is only a click away.
As a #1 International and USA TODAY Bestselling Author and Top-Rated Content Creator, you’d think I know a thing or two about using track changes in Word, and I do! I use it every day. A lot of people think it’s a useless tool, but I assure you, it’s a vital weapon in your arsenal and must be used with everything you write.
Find out how to make edits and track changes in Word through this handy guide. I’ll also show you how to display any type of markup for your edits.
Does Word Have an Edit Mode?
Sure does! Microsoft Word has an Edit Mode that lets you enable editing to the Word file. To enable the feature, all you need to do is click Review, then Restrict Editing. A Restrict Editing pane will appear. Make sure to uncheck all the items on the box.
Another way to edit a document in Protected View is by clicking File then Info. Then, choose Protect Document. Finally, select Enable Editing.
How Do You Enable Editing on Word Using the Keyboard?
You can turn it on by clicking Ctrl + Shift + E.
Can You View the Editing History of a Word Document?
Yes, a Word Edit History feature lets you see previous file versions. If you’re using Microsoft 365 on a Mac device, select Browse Version History.
For Word 2016 and 2019 users, choose File, then Browse Version History. Choose a version you want to check, then open it.
How to Use Track Changes in Word
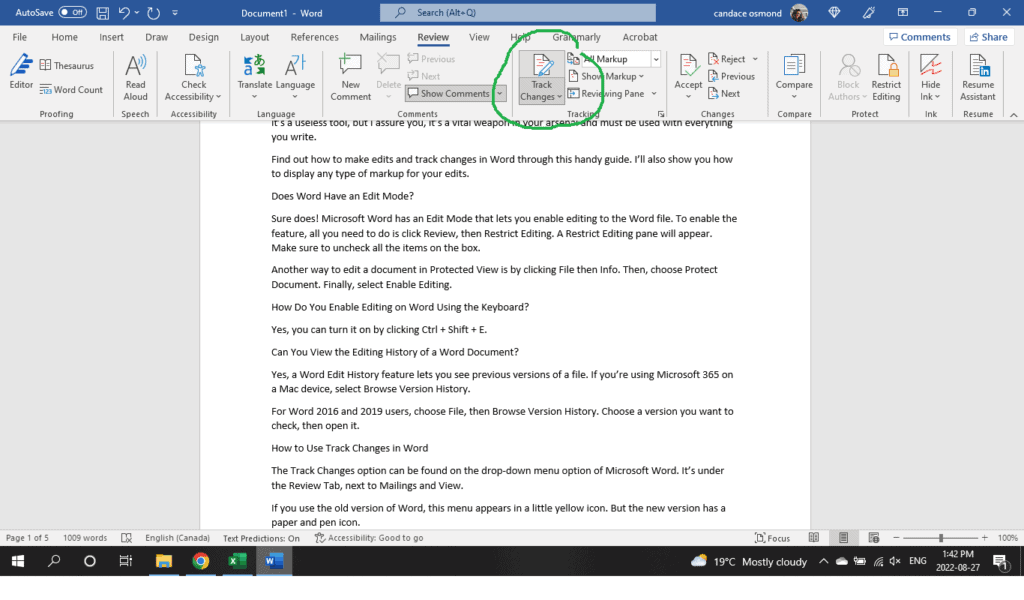
The Track Changes option can be found on the drop-down menu option of Microsoft Word. It’s under the Review Tab, next to Mailings and View.
If you use the old version of Word, this menu appears in a little yellow icon. But the new version has a paper and pen icon.
First, open a document by double-clicking Microsoft Word directly. Once it opens, select the Review Tab and Track Changes.
When you add text, it will be displayed in a different color. Any deleted text will also be noted on the right. And when you change a text’s format, the type of reformat will appear in a comment on the right.
Word Track Changes is a feature in the application that records every edit you make on the word processor. You can monitor whatever you move, add, delete, or format the original document.
Another benefit of the Track Changes feature is that other people who have received the current document can also see them. They also have the choice to turn the menu on or off from the drop-down menus.
One tip you should follow before making changes is creating a backup document of the original. This way, you have an original copy if the edited version becomes a mess.
Turn Track Changes On and Off

Turning off the Track Changes is the same as enabling it. On the Review Menu, click on Track Changes. The highlighted icon should disappear to show that you’ve disabled it. In the image here, it’s shown as on.
Other Options for Track Changes

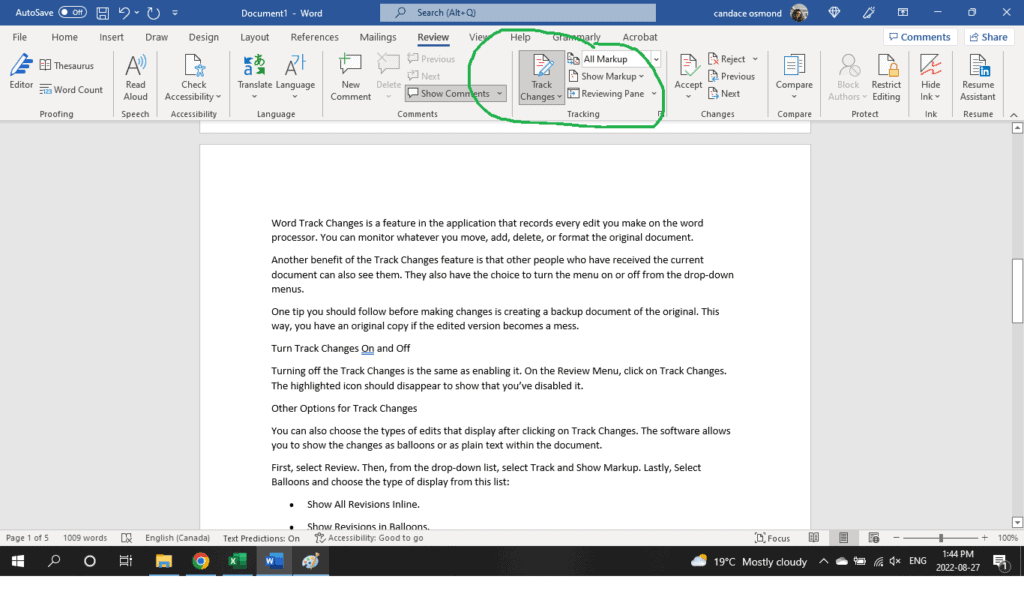
You can also choose the types of edits that display after clicking on Track Changes. The software allows you to show the changes as balloons or as plain text within the document.
First, select Review. Then, from the drop-down list, select Track and Show Markup. Lastly, Select Balloons and choose the type of display from this list:
- Show All Revisions Inline.
- Show Revisions in Balloons.
- Show Only Formatting in Balloons.
One of the editing options you can also do is choose from the markup options. From the Review Tab and Tracking, select All Markup. Then choose from the following:
- Simple Markup.
- All Markup.
- No Markup.
- Original.
You can also customize the type of edit that appears through the Show Markup option. Click on it, and it will open a menu with checkmarks.
Some users with whom you’re sharing the file might turn off the Track Changes. If you don’t want them performing this action, use the Protect Documents feature of MS Word under Tools. Add a password to the file, then select the type of protection you want for it.
Accept or Reject Track Changes

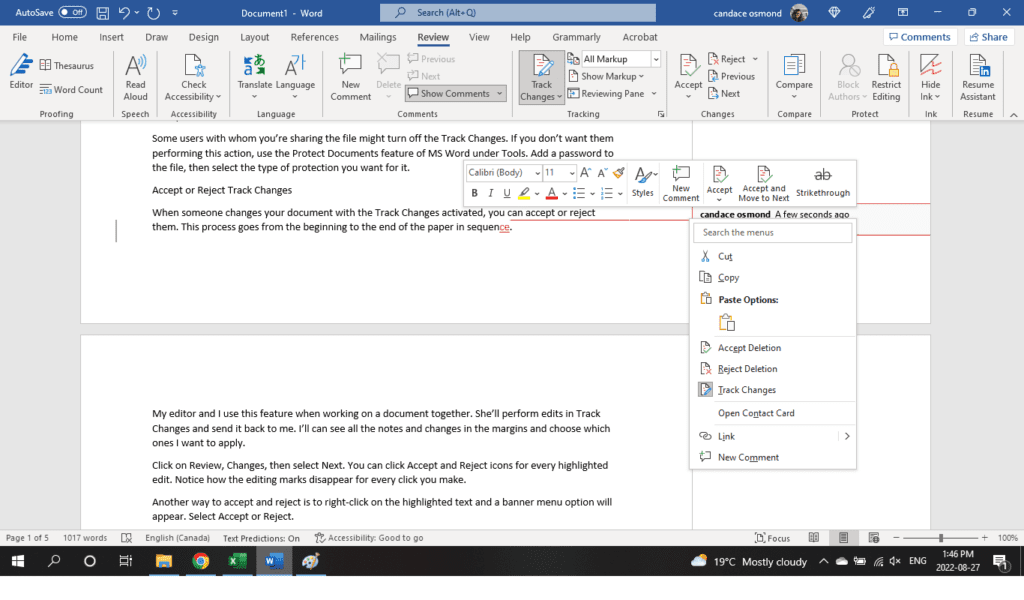
When someone changes your document with the Track Changes activated, you can accept or reject them. This process goes from the beginning to the end of the paper in sequence.
My editor and I use this feature when working on a document together. She’ll perform edits in Track Changes and send it back to me. I’ll see all the notes and changes in the margins and choose which ones I want to apply.
Click on Review, Changes, then select Next. You can click Accept and Reject icons for every highlighted edit. Notice how the editing marks disappear for every click you make.
Another way to accept and reject is to right-click on the highlighted text and a banner menu option will appear. Select Accept or Reject.
A third option is to Accept All Changes, which will apply everything in one click. But only use this if you’re confident that you want to apply all the changes to the document.
How Do I Make Comments in Word?

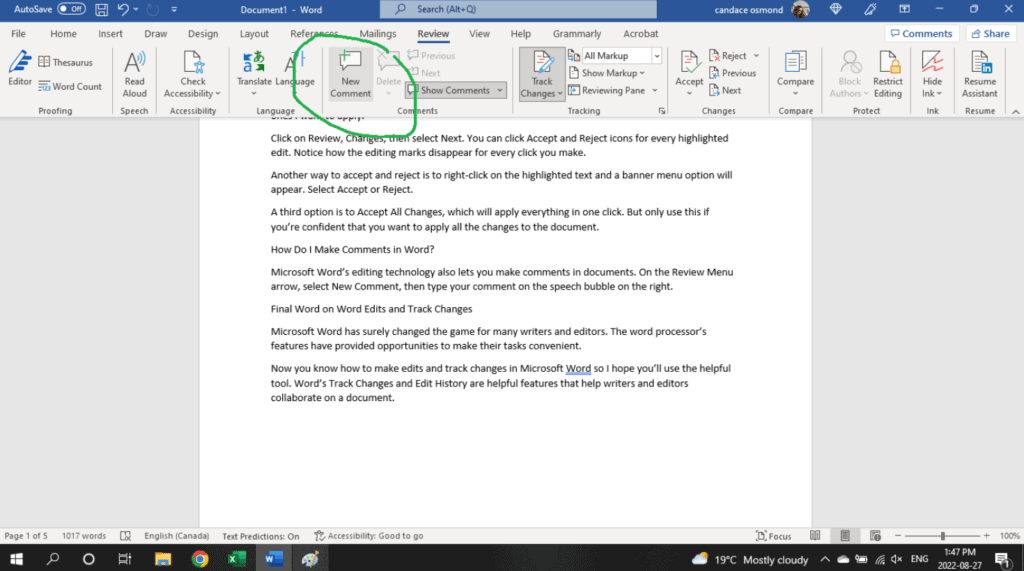
Microsoft Word’s editing technology also lets you make comments in documents. On the Review Menu arrow, select New Comment, then type your comment on the speech bubble on the right.
Final Word on Word Edits and Track Changes
Microsoft Word has surely changed the game for many writers and editors. The word processor’s features have provided opportunities to make their tasks convenient.
Now you know how to make edits and track changes in Microsoft Word so I hope you’ll use the helpful tool. Word’s Track Changes and Edit History are helpful features that help writers and editors collaborate on a document.
